MFJ-828 Digital SWR Watt Meter Review
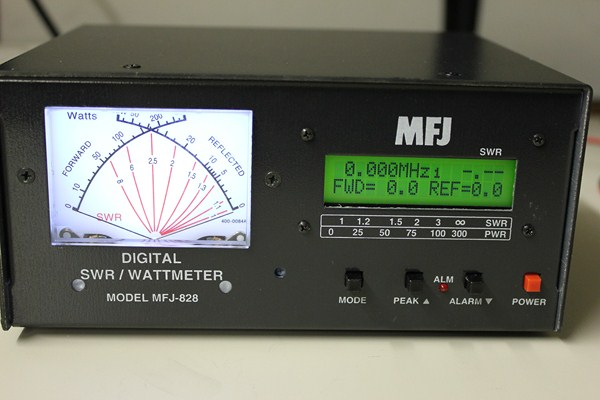
The first time you see the MFJ-828 ($229.95) you can immediately tell this isn’t your typical SWR / Watt meter. In addition to the cross needle display this meter also has a digital readout. If you already own a MFJ-259B Antenna Analyzer you’ll feel right at home with this meter as the display is very similar.
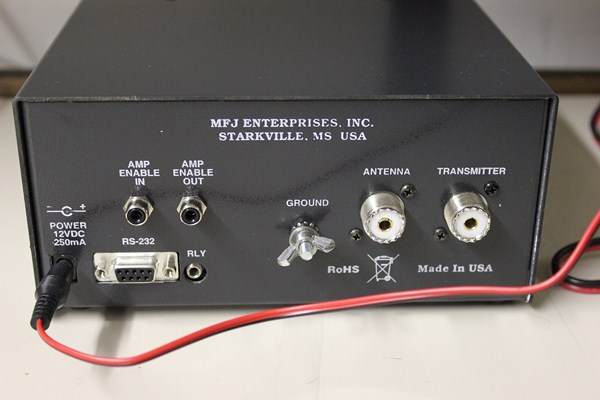
Looking at the back of the meter you’ll see some inputs and connections not normally found on most CB meters. At the far left is your power input (12VDC); a power cord is supplied with the meter but you’ll have to find your own power supply to power the meter. You’ll see two AMP in/out RCA phono connections on the back and you can hook these up to your amplifier control output/input. If you use an amplifier hooked up to these connections and you experience a high SWR event there is a high speed relay inside the meter that will trip and interuppt your amplifiers signal to shut down and prevent damage to your equipment.
The RS-232 input can be used to connect to your computer so you can download new software updates for the meter. There are also relay and ground connections on the back in addition to the antenna and transmitter connections. Made in the USA is clearly printed on the back and I can’t say how nice it is to see anything digital in our hobby that is made in the country (even if some of the parts are made elsewhere).
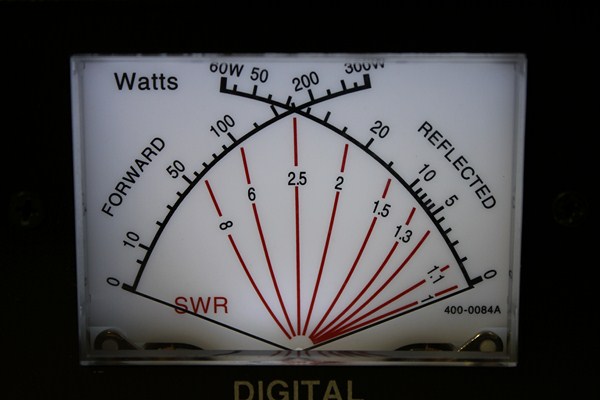
The mechanical cross needle meter isn’t very large in size (you’ll find yourself looking at the digital readout most of the time I suspect) but it’s still adequate to see what’s going on. It has a forward scale to show your output (peak or average) and a reflected scale to show reflected wattage. When the two needles swing upwards and cross you can see you SWR. The SWR scale is shown in red lines and where the two needles cross marks the SWR level.
No calibration is necessary for this meter to read SWR or any of the other readings for that matter. In fact you don’t even need to adjust for different power levels, the meter automatically senses the power input and selects the best power level setting. There are 30 watt, 300 watt and 3000 watt power ranges and each is triggered by different amounts of input to jump up to the next setting (25 watts bumps you up to the 300 watt setting, 250 watts bumps you up to the 3000 watt setting). All of this takes place automatically but sometimes you may have to wait a second or two for the meter to re-calibrate to a new power level before taking your reading.
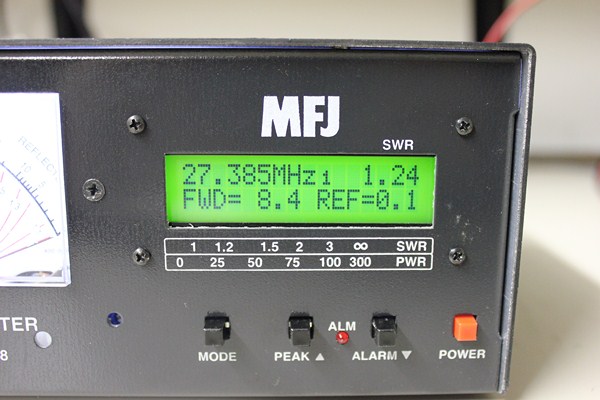
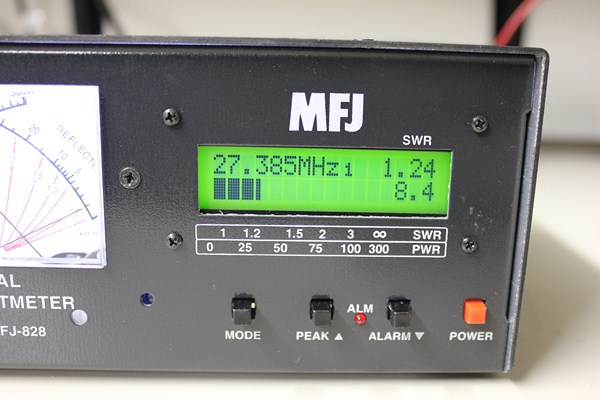
The digital readout is really what makes this meter so cool and it will provide you with four pieces of information. Your transmit frequency, SWR, Forward power and Reflected power. The frequency counter works like most other inline type counters and will give a reading when the meter is provided with a input carrier (deadkey). Durfing modulation or SSB use the frequency counter isn’t going to show a reading, so it’s primary use for CBer’s will be when using AM mode. The SWR reading is automatic and no calibration is needed, It will display the SWR in all modes.
The forward power will show your average or peak output and using the “peak” button on the front you can toggle between settings for peak Average power and Peak Output with 1 second, 2 second or 3 second hold. This delayed hold allows you to view your peak output at it’s maximum reading before it changes again when you’re taking. On SSB this can be a particularly handy feature. The reflected wattage reading will do just that – show your reflected wattage and this feature is also automatic.
The alarm button allows you to set up the meter to make a beep type alarm noise if your SWR exceeds a set value. You can manually choose the SWR level for when the alarm should sound. The mode button on the meter allows you to change the digitial display.
There are multiple options available and you can see all the information in text form (as shown in my first image) or you can choose to see certain aspects in bar graph form. (see manual for more details). Below the digital display is a printed key which you can use to measure the bar graph readings.
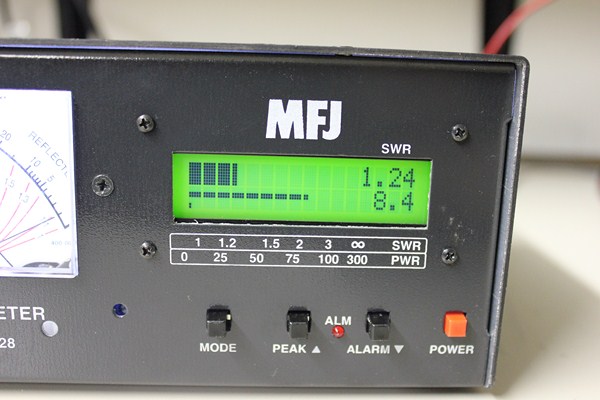
You’ll see in the image above one of the bar graph display options Showing SWR on the top bar graph, forward power on the middle bar graph and reflected power on the bottom bar graph.
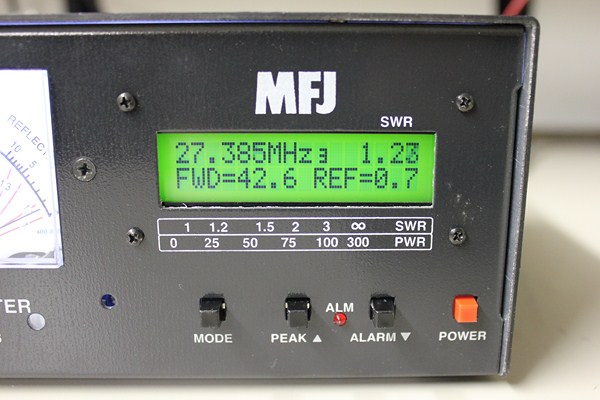
One of the big reasons to own a higher end meter like this is it’s TrueActive peak reading circuit which allows the meter to give true peak readings in all modes. When taking it’s readings the circuit board does some fun math equations with the sampling and then returns the peak results. In the image above you can see the peak reading for a newer style RCI-2950DX. The digital readout also will display the peak reading after you unkey so in case you weren’t paying attention the information doesn’t immediately disappear when you stop talking.
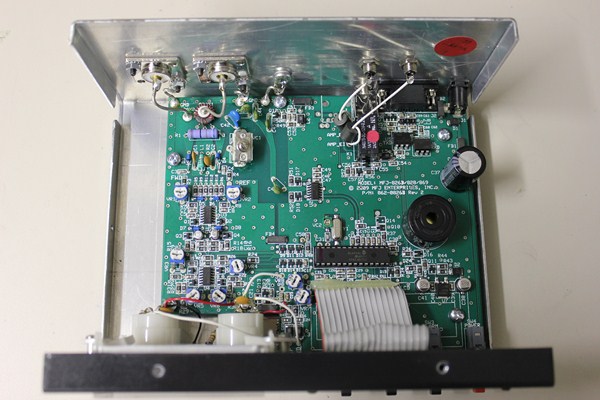
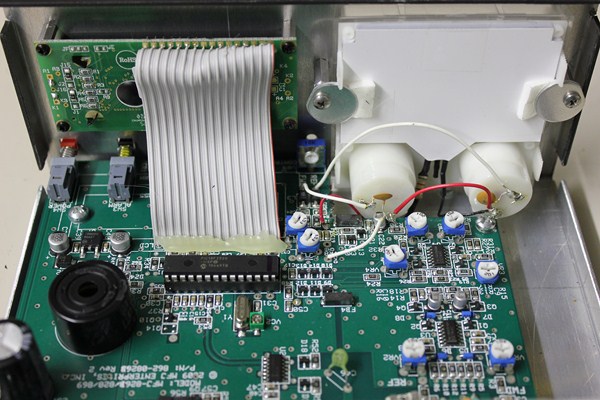
Unlike many lower end meters that have a simple circuit board with only a few components the MFJ-828 is a much more sophsticated piece of equipment. It uses surface mount technology and so the parts on the board are small and the meter is very light in weight. There are adjustments inside (if you have proper test equipment) and before I forget to mention it, there are adjustment as well on the front of the meter just below the cross needle display where you can “zero” out the needles if necessary.
WATTAGE – The meter seemed very accurate for it’s average and peak readings and it was very nice to see the reflected power shown on the digital display in a numerical format. The meter is sensitive and I did find that when using an over-tuned radio with known harmonics the meter (like many meters) read a higher output than actual. This was remedied by adding a low pass filter in line which is something I’d recommend to all operators who are trying to get more accurate readings on their peak wattage.
Important Note: The meter begins taking it’s readings (for all functions) when triggered by input wattage. I found that the meter did not seem to trigger at lower power levels (4 watts or less) which means if you are running a stock CB radio this meter might not be the best choice. The meter also would not be very useful for setting a low deadkey for an amplifier or other work where you need to know a low output level. These meters were generally designed for the ham radio market and most radios in that market have higher output and so that’s where this meter performs it’s best.
SWR – Readings were very close to the known readings on my other meters and the MFJ-259B Antenna Analyzer I use.
FREQUENCY COUNTER – As mentioned before the frequency counter will most likely be utilized by CBer’s when in AM mode. This might be handy if you have a radio that has “extra” frequencies added but doesn’t have a frequency display.
SUMMARY
This meter is in a higher price range than many meters but it’s still within what I would consider the affordable range for accessory equipment. There are meters that are more expensive than this one that are even more accurate but unless you’re really hardcore I think a meter at this level and price range is probably the upper limit for most CBer’s and Ham operators. While the price is higher you’re also getting a much more sophisticated piece of equipment that is likely better made than your current meter and with it’s TrueActive system is probably more accurate.
The real beauty of a meter like this is that although it is sophisticated in it’s inner workings it’s a piece of cake to use and even the most technology fearing operators shouldn’t have any problems figuring out how to work it.
Some of the little things I was impressed by – it’s build quality and the fact that it’s made in the USA, and the comparitive accuracy of the readings on the mechanical meter and the digital meter. Many times when you blend physical movement and digital readings you get two different sets of information but I was pleasantly surprised to see that the cross needle meter was mirroring the results on the digital readout.
My main complaints for this meter would be it’s lack of ability to take measurements at very low QRP levels. As someone who opens up a lot of radios and measures in the 1-2 watt power ranges quite often I found it’s not a meter I could use for those purposes. For average peak readings there isn’t a hold option and so in those cases I found the cross needle easier to read than the digital readout which was jumping around. I also found in one instance when testing with an amplifier I used a short coax jumper and the meter didn’t seem to like it and gave me an alarm which went away when I used a longer jumper between the amplifier and meter.
You won’t find a whole lot for reviews of this meter online. On eHam it has mixed reviews – two very positive, one so/so and one negative. In some other pieces I’ve seen ham radio operators talk of owning this meter for over a year and not having any problems and touting it’s ease of use and especially enjoying the autoranging/calibration features.
Overall I’m very impressed with this piece of equipment. If you’re someone who isn’t into digital readouts it probably isn’t your cup of tea but for those operators who like to see information displayed in numerical form rather than trying to quickly read a printed graph it’s a very neat tool. For many CBer’s the price may put this out of range as a everyday meter but I have to say, being able to see your frequency, SWR, Forward and Reflected wattage all at once is pretty priceless.
MANUAL – Click to open PDF