RCI-2970N2 10 Meter AM/FM/SSB Export Radio Review
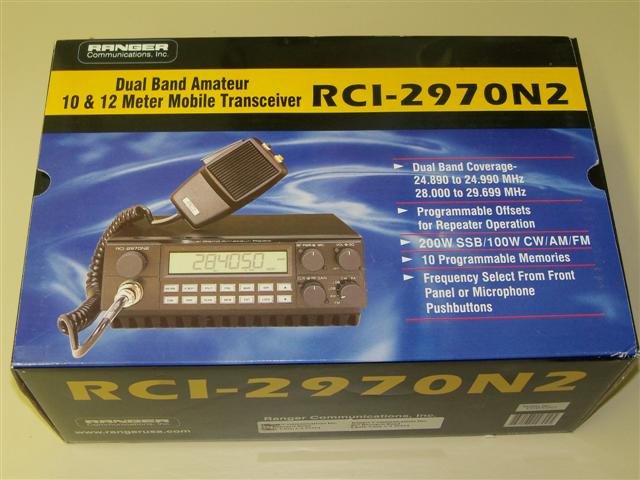
What do you get when you take one of the most popular SSB 10 meter radio lines (2950DX/2970DX) and add more power? The new RCI-2970 N2.
I owned a 2970DX for many years and I found it was the perfect radio for talking DX on SSB. The N2 takes all the best parts of that radio and then boasts output wattage in the 200W range. A lot of people have been asking to get a better look at this radio.
Below you’ll find a full overview with pictures and information INCLUDING additional information on the newest release of this model that sports the updated display and added features.
THE BOX
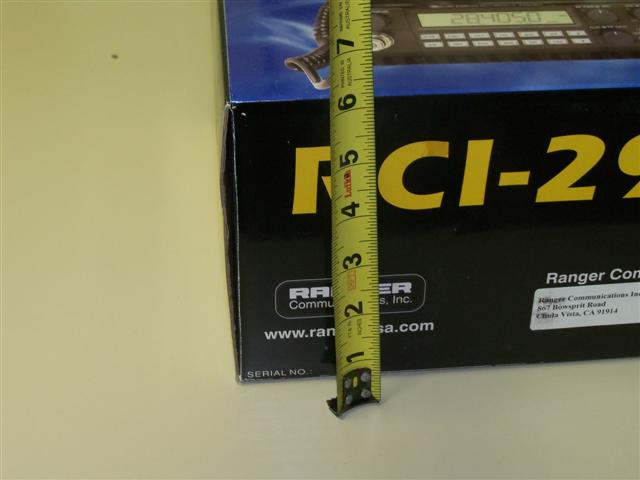
This isn’t your average dual final export radio and before you even open the box it’s apparent. The box is larger to accommodate a radio that has around 7 times the output of your standard export radio. The radio is sold and marketed as a 10 and 12 meter radio and many ham radio operators use these radios with solid results.
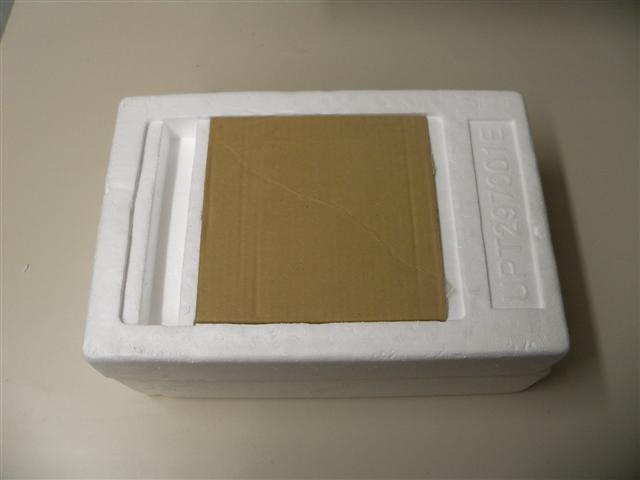
The radio comes well packed in styrofoam and the power cord and microphone are separated in cardboard sections.
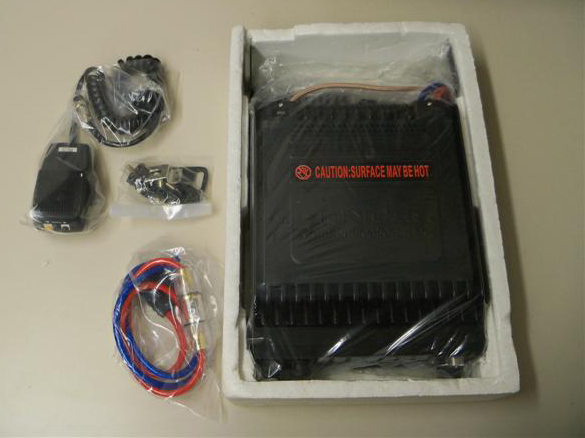
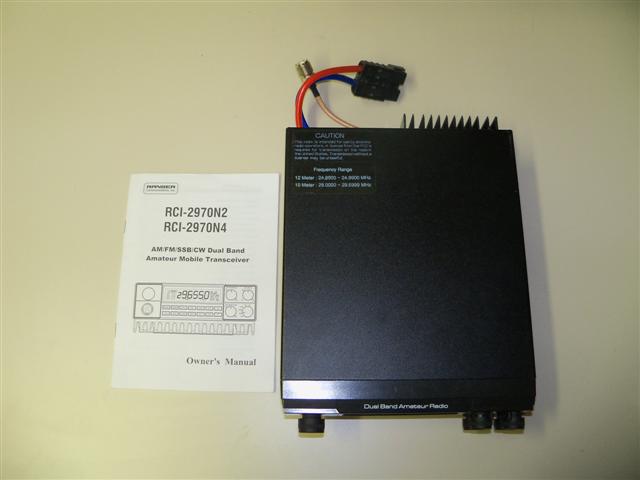
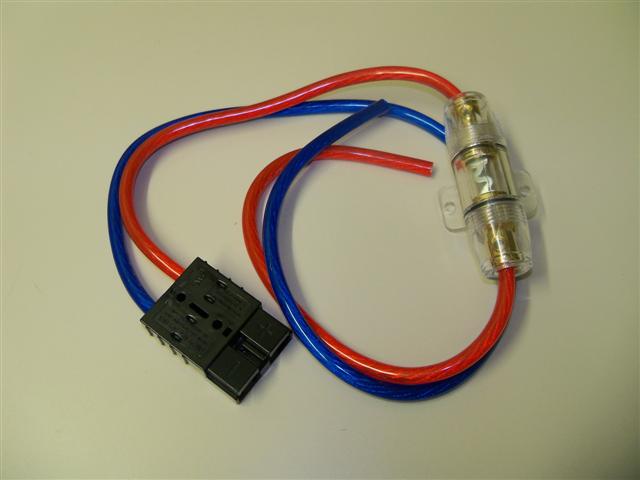
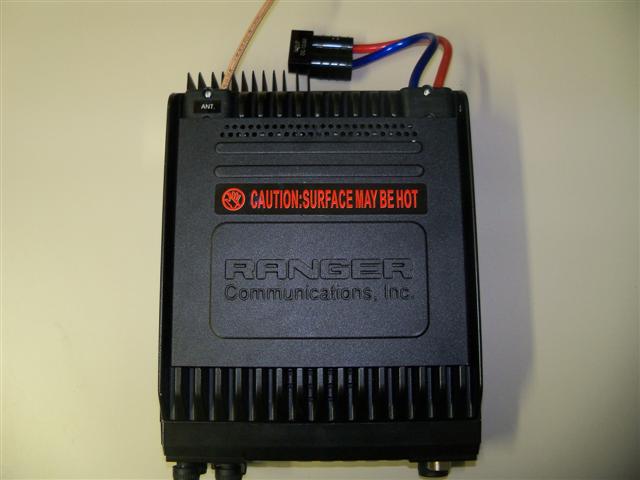
As you unpack the radio you can see the large heat sink final section on the bottom, the standard RCI microphone, and the interesting power cord.
Looking from the top the radio is roughly the size of its smaller sibling the RCI-2950DX and it’s predecessor the 2970DX. The majority of features and internal components on the main board are almost identical as well.
If you look at the manual that comes with the N2 you will notice the N4 model listed – unfortunately I believe that project is on hold currently, but we can always dream.
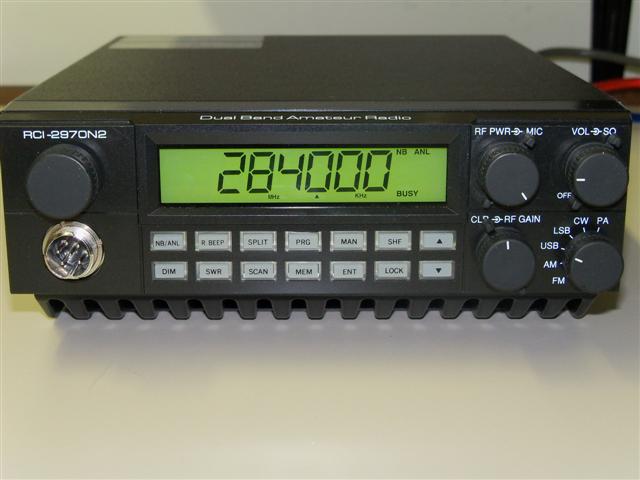
The face of the radio looks much the same as the 29xx series but the front face is a black color now, which is slightly different than the grayish tone on the previous models. The controls, however, are the same as is the layout and the display.
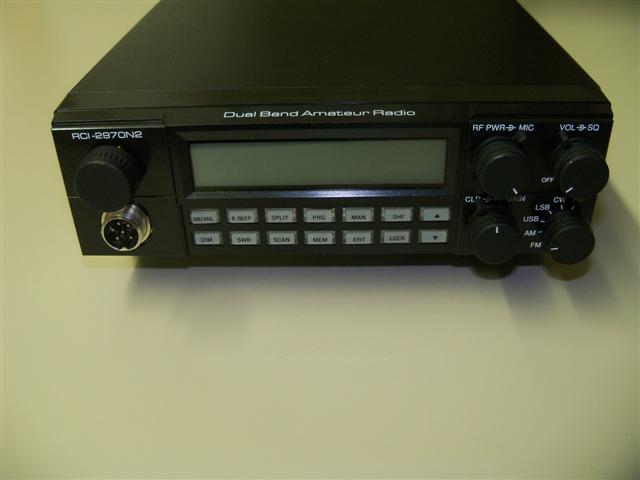
Features on this radio are abundant, including split frequency operation, frequency scanning, internal SWR function, and a roger beep; it has everything an operator needs. In some cases its many features scare off the operator who prefers the look and feel of the more traditional face radio. Don’t let this be the case for you – if you are looking for a solid SSB radio the 2970N2 is easy to use and it only takes a couple of minutes to familiarize yourself with the basic operation.

Front Panel
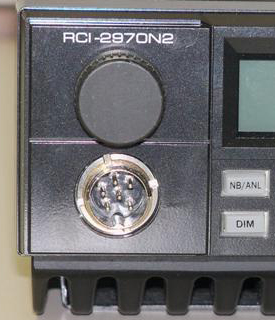
1. FREQUENCY SELECTOR: Used to set the desired transmit and receive frequency. The frequency is digitally displayed in the LCD window next to the selector. The FREQUENCY SELECTOR knob next to the LCD display, allows changing each digit on the frequency display by first placing the frequency display cursor (using SHF button) below the desired digit and then turning the selector knob.
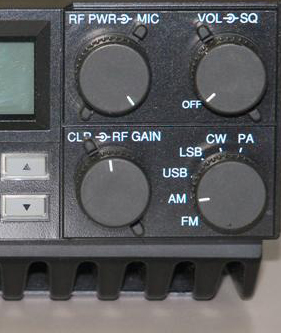
2. RF POWER CONTROL: This control adjusts the Transmitter’s RF power output level.
3. MIC GAIN CONTROL: This feature adjusts the microphone gain for the transmit and PA modes. Experiment with this control for the setting that will provide best audio quality. Avoid over-modulation, which causes interference to adjacent stations and “splatter”.
4. ON/OFF VOLUME CONTROL: Turn clockwise to apply power to the radio and to set the desired listening level.
5. SQUELCH CONTROL: This control is used to control or eliminate receiver background noise in the absence of an incoming signal. For maximum receiver sensitivity, it is necessary that the control be adjusted only to the point where the receiver background noise is eliminated. Turn fully counterclockwise and then slowly clockwise until the receiver noise just disappears. Any signal to be received must now be slightly stronger than the average received noise. Further clockwise rotation will increase the threshold level that a signal must overcome in order to be heard. Only strong signals will be heard at a maximum clockwise squelch setting.
6. RF GAIN CONTROL: This control is used to reduce the receiver’s front end gain when receiving strong signals.
7. CLARIFIER CONTROL: Allows variation of the receive frequency above and below the selected receive frequency as shown on the display. This control is intended primarily to tune in SSB signals when communicating with several stations that may not be exactly on frequency. It may also be used to optimize AM/FM signals as described in the operating procedure paragraph. The clarifier can adjust the receive frequency ±2.5KHz but does not affect the transmit frequency or the frequency display.
8. MODE SWITCH: This switch allows you to select one of the following six operating modes: FM, AM, USB, LSB, CW and PA.
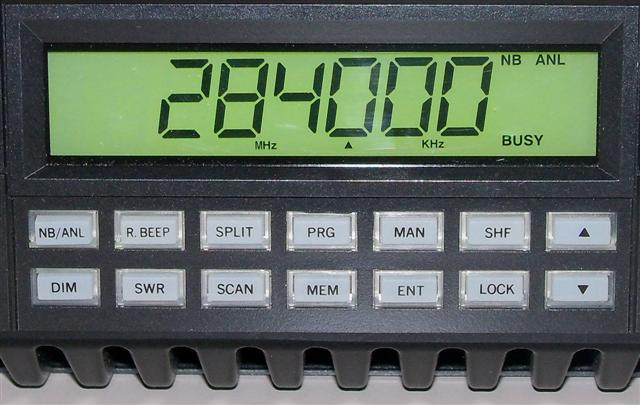
9. NB/ANL BUTTON (NB/ANL): The noise blanker (NB) is very effective in eliminating repetitive impulse noise such as ignition interference. In the ANL position, the AUTOMATIC NOISE LIMITER also limits noise at the receiver audio stages.
10. ROGER BEEP BUTTON (R.BEEP): This switch activates the ROGER BEEP circuit, when its function is selected. When enabled, the radio automatically transmits an audio tone each time you release the PTT. This indicates the end of each transmission so that stations who may be having trouble receiving will know that you have finished transmitting. This feature is sometimes used in weak signal conditions or other special circumstances. We discourage use of this feature in normal operation, as it can be annoying to other operators.
11. SPLIT BUTTON (SPLIT): Enables the offsetting of the transmitter frequency by up to ± 2 MHz (programmable) for FM repeater operation.
12. PROGRAM BUTTON (PRG): Used to pre-program operating or scanning frequencies into memory. See the OPERATION section of this manual for details.
13. MANUAL BUTTON (MAN): Used to return the unit to manual mode. (Switches from frequency display to CB 40 channel display once the radio is converted).
14. SHIFT BUTTON (SHF): Determines which digit will change when changing frequencies, by placing a “cursor” under the desired digit. Allows frequency to be changed in 100 Hz, 1KHz, 10KHz, 100KHz and 1 MHz increments.
15. DIM BUTTON (DIM): This button adjusts the display backlighting in four different steps to best match the ambient light.
16. SWR BUTTON (SWR): Used to check relative SWR.
17. SCAN BUTTON (SCAN): Used to enable the scanning of frequencies. See the PROGRAMMING and SCANNING section of this manual for detailed information on using the scan control.
18. MEMORY BUTTON (MEM): Used to program often used frequencies in memory. Detailed information on how to use this control is provided in the PROGRAMMING section of the manual.
19. ENTER BUTTON (ENT): Used to program frequencies in memory. See PROGRAMMING section.
20. LOCK BUTTON (LOCK): Disables the Frequency Selector Control, UP/DOWN buttons on the front control panel and remote UP/DOWN buttons on the microphone. Pressing this switch again will re-enable the frequency selectors.
21. UP/DOWN SELECTOR: These buttons are used to increase or decrease the frequency digit above the SHF cursor on the display.
POWER CORD AND ANTENNA CONNECTORS
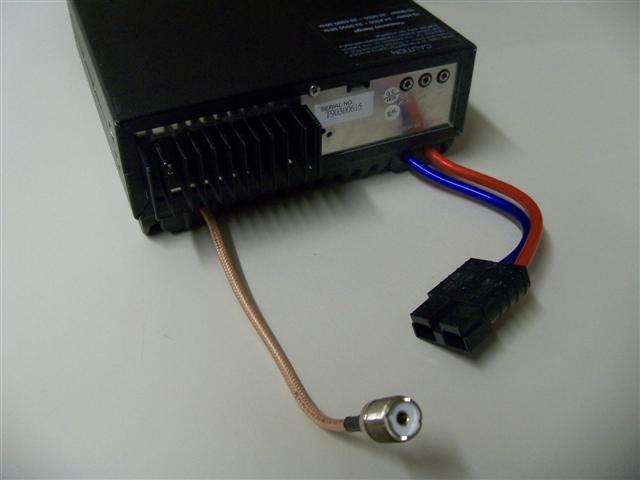
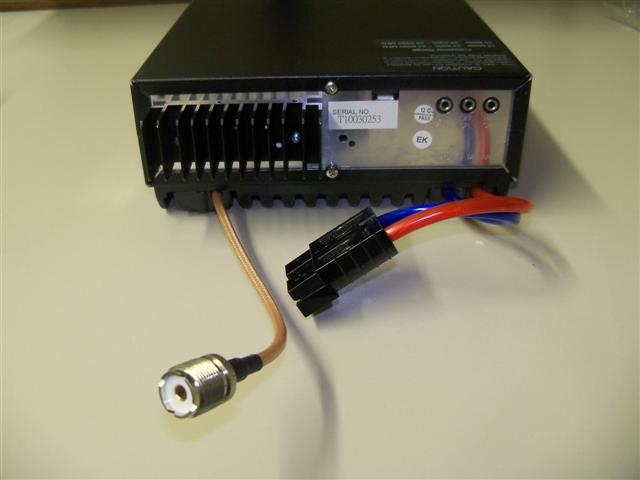
This isn’t your ordinary high power radio and so you wouldn’t expect it to have an ordinary power cord. The 8 mosfet transistors will achieve 200 watts output and they do so by pulling some serious amps up the power cord. The radio comes from the factory with a 8 gauge wire hookup kit and as you can see in the picture the power wires are hard wired directly to the amplifier section. The connector is a heavy duty quick disconnect and of course you are provided with the other half (not pictured) which has roughly 2 feet of wire attached. Since 2 feet isn’t long enough to reach to your battery you will need to run 6 or 8 gauge wire from your battery to the radio power wires. I’d suggest putting a fuse right at the battery and make sure to use high quality power wire (all power wires weren’t created equal).
The antenna connector sits on a piece of coax that comes straight out of the bottom amplifier section of the radio.. You screw the male end of your coax onto this piece and you’re ready to start talking.
MICROPHONE
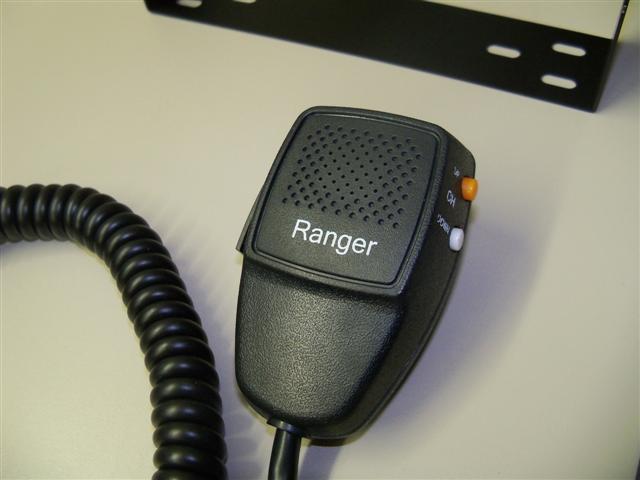
The microphone looks the same as the one included in previous versions (NOTE: The microphone included with the latest black face N2 models is different – see new black face section at the latter part of this review).
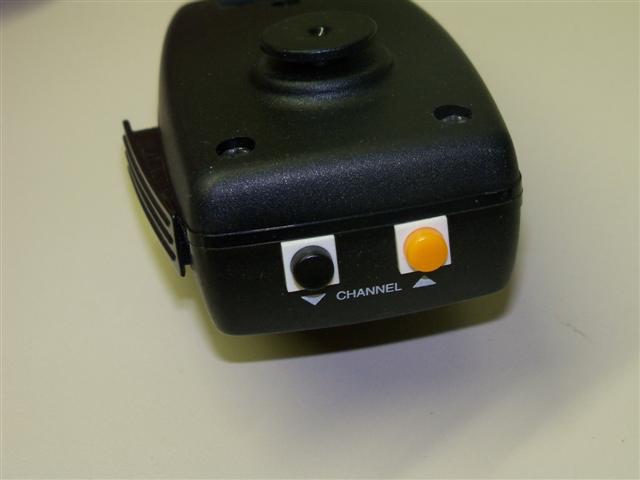
Sporting the up down buttons on top you can easily change channels / frequencies without having to reach over and touch the radio. In many installs I’ve had to place the radio in the passenger foot well or someplace a little hard to reach and the buttons on the microphone always come in handy when cruising down the freeway.
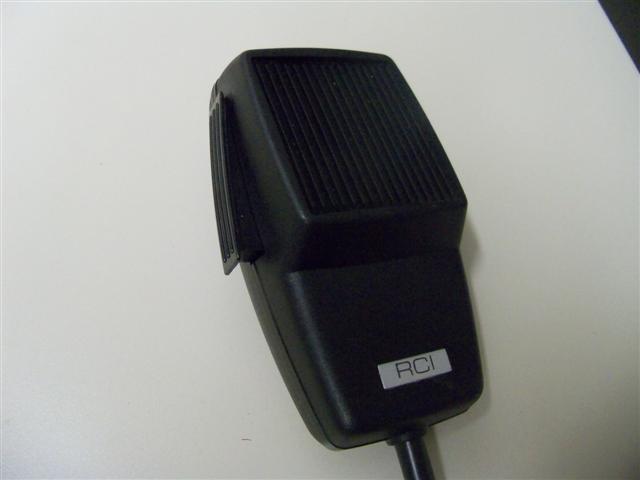
The microphone looks fairly plain and it is. Nothing to see here folks, just a nice standard microphone. Modulation with the stock microphone isn’t great and neither is the noise canceling. However, I will say that in my experience the stock microphone usually matches up well with different people’s voices even if the performance isn’t anything special.
BIG ASS POWER WIRES
I apologize for the vulgar title to this section but these really are some big ass wires for a CB radio. Unlike previous 2970DX versions the new N2 uses 8 gauge wire and a large 50 amp fuse inline to protect the radio. This radio draws around 18-25 amps without a tune and once some of those techs out there tweak these radios they will pull even more amperage. There have been tales of the radios drawing enough power to shut down 36 amp power supplies.
You can’t use cheap or inadequate power wires when pulling high amperage so RCI bumped up the diameter of the power wires. Upon inspection it does seem to be nice high quality power wire and for this radio it is definitely recommended to run your wires direct to the battery. As mentioned above I also recommend installing a fuse at the battery since you’ll most likely have to run your wires through the firewall of the vehicle.
For those running these radios on power supplies in the home you can get away with something like a Pyramid 36KK power supply but if you have one of these radios running higher output and pulling bigger amps you’ll most likely want to just pony up and buy a 45 or 52 amp power supply.
DISPLAY
The display on the N2 remains the same as the previous 2950/2970DX versions (NOTE: the newest 2950/2970 N2 models now have a black display with green numbers).
Many people including myself will tell you that this display is great for visibility because of the large size of the numbers and the nice contrast of the black on green BUT we will also tell you that while the display is great to look at straight on, from an angle it becomes a serious pain.
While these radios are one of my favorites, the weakest link to me has always been the display. Much like the old HR2510’s, when you try to look at the display from an angle (especially in sunlight) the numbers virtually disappear making it very difficult to read. Now this all depends on the viewing angle and your install, but it definitely was something that needed improvement and new black display model does offer better viewing, which we will discuss further along in this review.
INSIDE THE N2
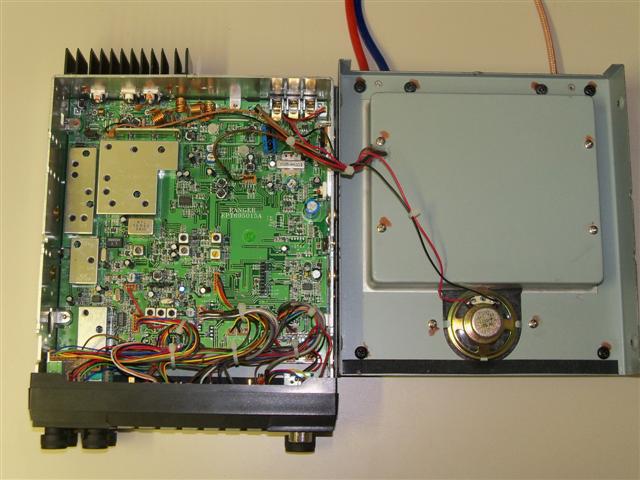
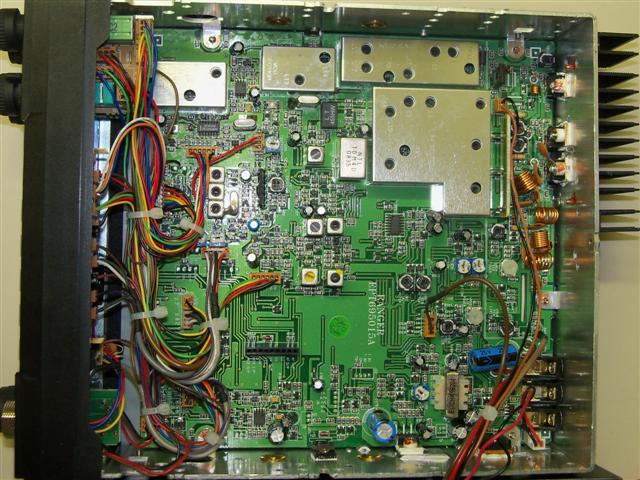
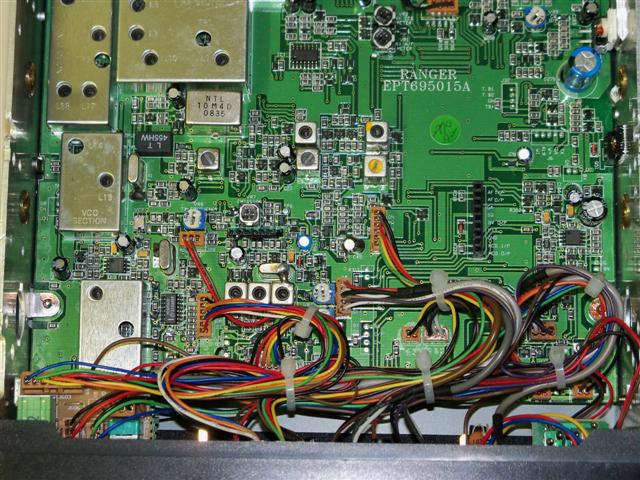
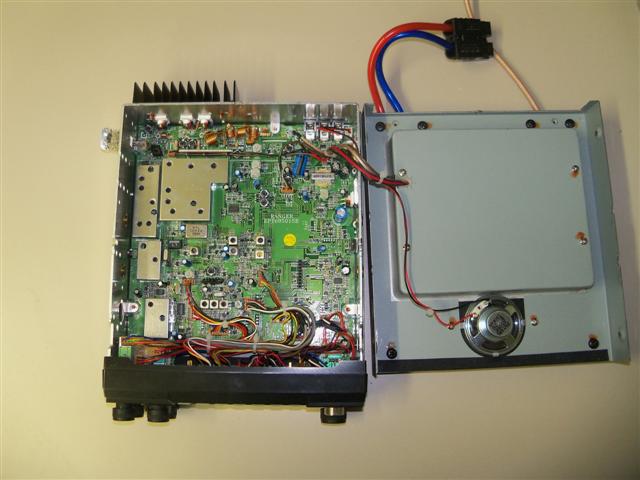
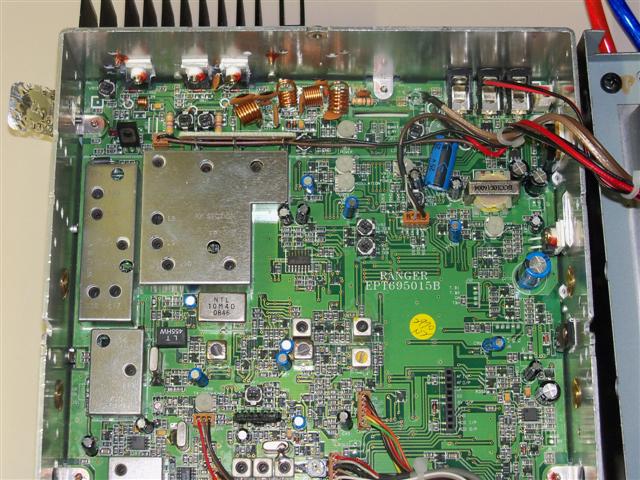
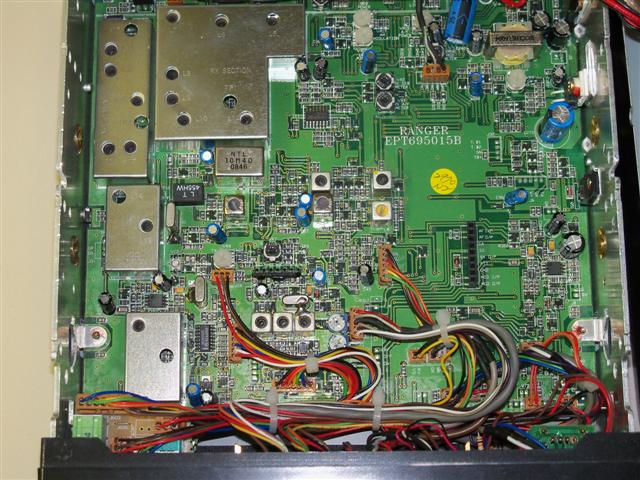
The N2 board will look basically identical to the 2950/2970DX models and all the tuning locations and mounted parts are similar. The main difference of course is hidden in the large metal amplifier enclosure attached to the speaker side of the radio. The power wires and the antenna coax both lead out of this section of the radio.
As you can see the speaker is fairly tiny compared to the speakers on many radios but it does still offer quite good sound for the size. A high quality external speaker is probably a good addition to run with the radio but the little speaker will work for those who need to use it.
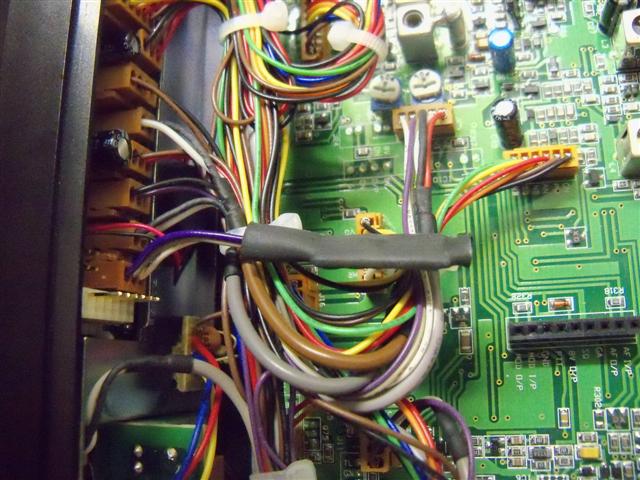
Frequency conversion for expanded frequencies on the newer 2950/2970DX & N2 models is accomplished with the use of an E-Chip which can be plugged into the front section of the radio. This is what allows this radio to have frequency coverage on 10-12 meters. Please note – while use of these radios on CB frequencies is fairly common the N2 is a 10 meter Amateur radio and therefore is not type accepted by the FCC for citizens band use. For those ham radio operators who like to talk on 10 meters and listen on 11 meters (CB) this radio is a great go-between.
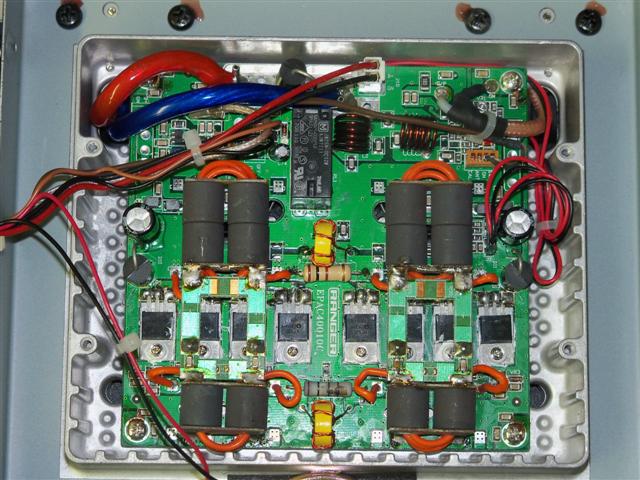
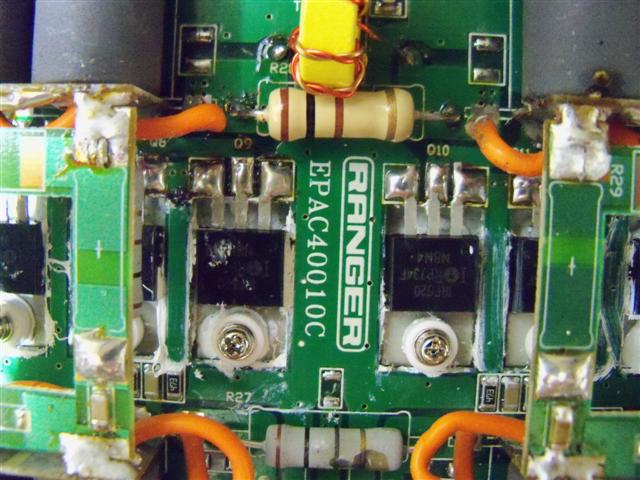
And finally we come to the amplifier section – the sweet layout of 8 mosfets transistors all lined up and ready for battle.
Once we removed the covers you can see large power wires entering from the left hand side and the coax cable coming in from the right. The mosfet transistors are all soldered in a row and mounted below the amplifier board is the fan section which is thermostatically controlled for cooling once the amplifier sections reaches a certain temperature.
These 8 transistors will heat up and depending on how the radio is tuned up they can get very hot. The fan section does a fairly good job for cooling and the heat sink helps dissipates the heat but I personally would like to see even more cooling.
If you run the radio for a while and it heats up the fan system will continue to run even after the radio is turned off much like radiator fans on many cars. So if you hear a sound after tuning off the radio most likely that is what you’re hearing.
When these radios first came out there were some reports of transistors failing and radios with excessively high output from the factory. Ranger said that many of those initial issues were associated with over-tuning by radio shops, but we do know of one case where the radio was stock and output was too high resulting in transistor failure. From what I’ve heard Ranger did a very good job of taking care of people for warranty issues on those early models. While I’m not sure if it was just a assembly line tuning issue or if they made any fixes I think those issues must have been addressed because straight out of the box this new stock N2 performed proper output numbers and I didn’t encounter any issues. I also have talked to other recent purchasers of the 2970N2 and everyone seems quite happy with the performance and quality at this point.
I think it’s important to note here that much of the industry is making the change to mosfet type transistors. This is partly due to the coming discontinuation of the 2SC2879 transistor and also because of the low output issues many manufacturers encountered with newer 2SC2290 transistors from Toshiba. While Mosfets transistors are more readily available they generally aren’t as rugged as the previously used pill type transistors and so over-tuning these radios to squeeze the extra couple watts of swing on the meter in these models isn’t recommended.
10 METER HAM RADIO USE
It’s fairly common knowledge that many CBer’s do illegally modify and use these radios but we’d like to point out that these are high performance radios that are used by amateur operators worldwide daily. Some outspoken hams tend to be negative about these radios merely because they are popular with CBer’s but a large portion of these radios are purchased by ham operators for 10 meter use and find themselves in the hands of licensed operators.
While much of the 10 meter “export” market consists of radios with things like echo or talkback, the RCI series radios definitely do not fall into the same category and are more in line with other HF transceivers produced for the ham market. On many occasions I’ve talked to hams running these models for phone (voice) in the 28.400 range and they sounded excellent on the air and the operators seemed very happy with the radios. Even QST Magazine offered a review of these series radios back in 2001
The Ranger 2950/70DX models and the N2 also support the ability to add a CTCSS tone board for those who need to access repeaters (isn’t one in my area but in more populated areas of the country and worldwide there are 10 meter FM repeaters).
We know the arguments regarding the grey areas of “export” radios will continue for many years but this series of radios has definitely proven that they are a quality product that has a place in the market. With the complete dropping of the code requirement for new hams and the fact that one of the few areas they are allowed to talk in the HF spectrum is the 10 meter phone portion, I think an inexpensive HF radio is a great tool to get them excited and involved with DX. (For those interested RCI also makes a 6 meter radio RCI-5054DX which is also an area Tech License operators have access to use – see bandplan).
PERFORMANCE
200+ watts. I think that sums up a lot for most people. Take the famous frequency stability and SSB operating ability of the 2950/70DX and bump the wattage up and that’s what we have in front of us. An export radio that is capable of high output and great all around performance.
I set my radio up to key on AM around 40 watts and easily swing in the 150-200 range. With some adjustments to the modulation pot I easily achieved 100% modulation and received good reports on AM. I did record myself from the mobile and while we know from previous models that the AM audio on these radios is not the crushing loud audio found on some Galaxy models it’s more than adequate and much clearer than many other export radios..
SSB is always where these radios have made a name for themselves and there really isn’t much more I can add that hasn’t been said before. Great stability, excellent SSB audio, and great receive. The one complaint people bring up about these radios is that there is some white noise in the receive but with a little tuning in the receive section they can be set up to be a bit quieter. This white noise never effects my ability to hear other stations and so I chalk it up as a minor annoyance. People have remarked on forums and elsewhere that the new N2 does seem to have less of the white noise and a quieter receiver than previous 2950/2970 models. We did hear from RCI that some small changes in the receive section were incorporated into these newer radios.
SUMMARY – WAIT JUST A MINUTE
Normally this is where I would do the summary for the review, but it seems RCI has done a little backroom tweaking and lo and behold the new black display 2950DX and 2970N2’s have been released right as I was writing this article. Below you’ll be treated to a picture intensive section on this new model.
Please excuse the plethora of photos but I just couldn’t help feeling like I needed to show off this cool new display.
NEW BLACK DISPLAY RCI- 2970 N2
We’ve often pondered on what would be some cool improvements for our trusty 2950DX and while I often envisioned a blue display or maybe some different looking numbers it never crossed my mind to invert the colors on the display and that’s just what RCI did. It seems like just a simple change but it really does change the whole look of the radio and the overall response from operators is they like the change…big time.
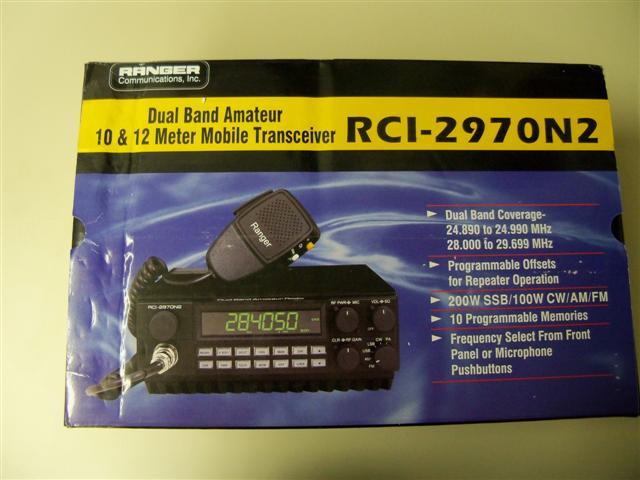
After opening the box on the newest version of the N2 we discovered that the radio looks identical to the previous version and the wires, radio case, shape, bracket and just about everything is the same….BUT WAIT… the microphone seems to be different.
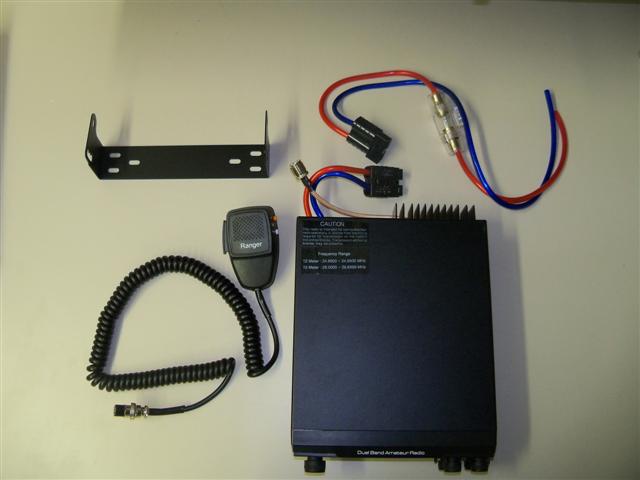
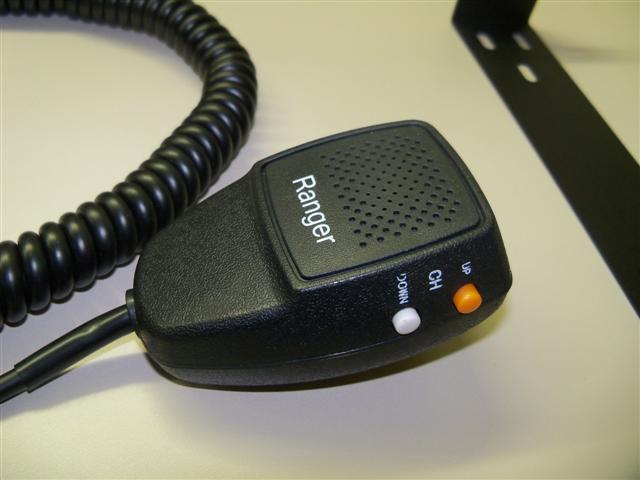
RCI has ditched the previous coffin style looking microphone and added a modified SRA-158 with up/down buttons on the side. This was definitely something that made me happy as I consider the SRA-158 as one of the best stock microphones on the market. I’ve found this microphone to match up well on many radios and upon giving it a test in conjunction with the new N2 I found it sounded better than the previously included microphone and gave the radio louder audio and more swing – especially on AM.
While everything looked identical when unwrapping the radios, obviously there is a big difference between the old N2 and the new N2. The black display makes its appearance and I can’t tell you how excited I was to turn this radio on and see how it looked.
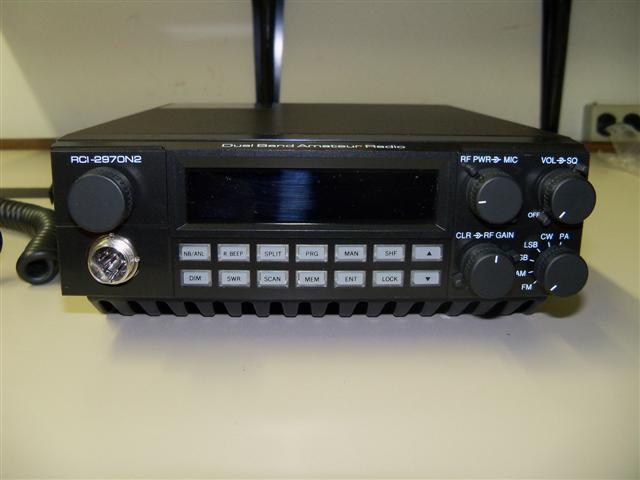
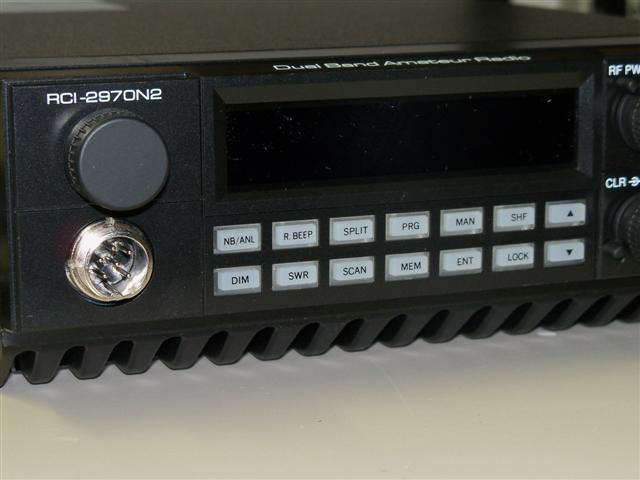
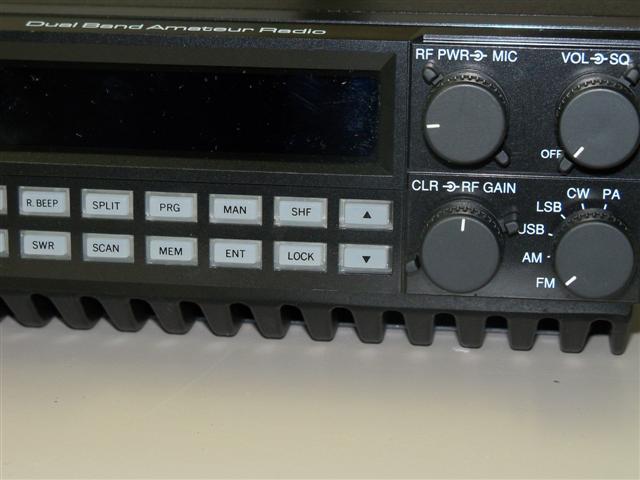
Once we powered on the radio I were greeted with a very nice contrasting display and it was immediately apparent that the inverted colors were easier to read and the overall look was very pleasing.
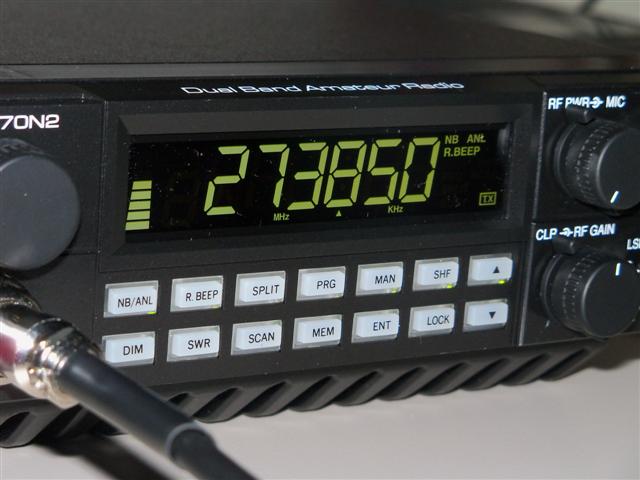
One of the differences from the old display to the new display was slightly better legibility from an angle. I tried looking at the display from various angles that had previously given me problems and while the issue is still far from being solved there is marked improvement.
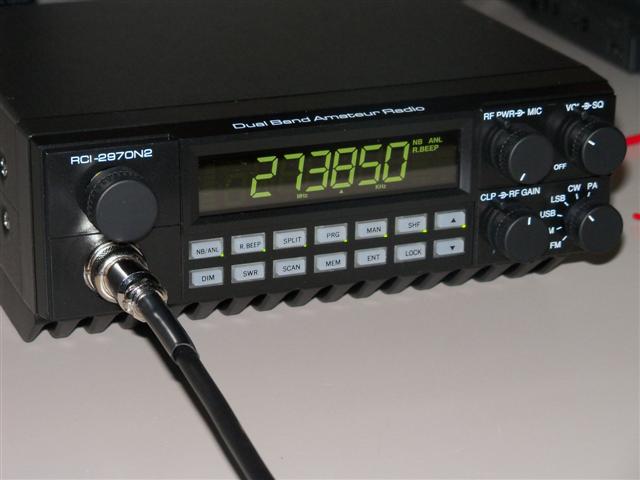
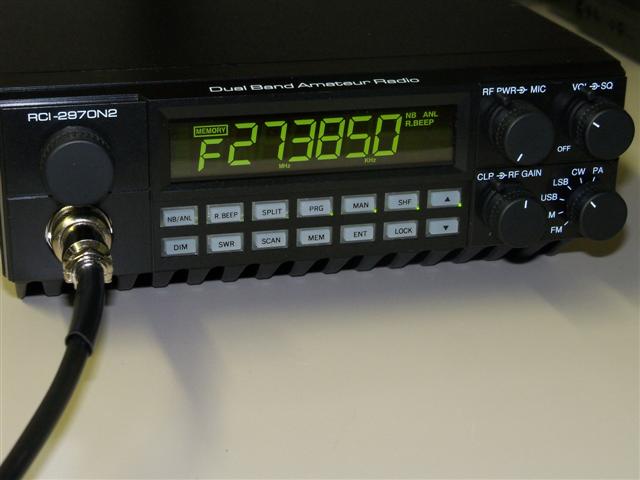
Besides the new display (as if that wasn’t enough to make you ditch your old 2950DX for a new one) RCI did expand the frequency storage abilities of these radios. In previous models there where 10 memory banks for storage while on the new radio there are 16. The radio still uses the 0-9 location identification method but upon going above 9 you’ll then jump to Alpha characters A-F.
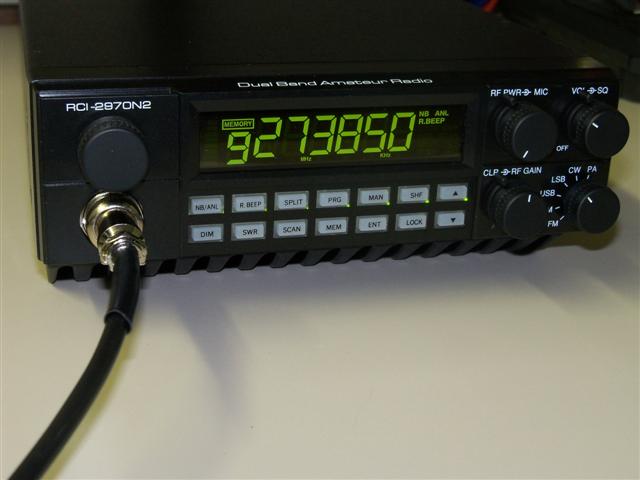
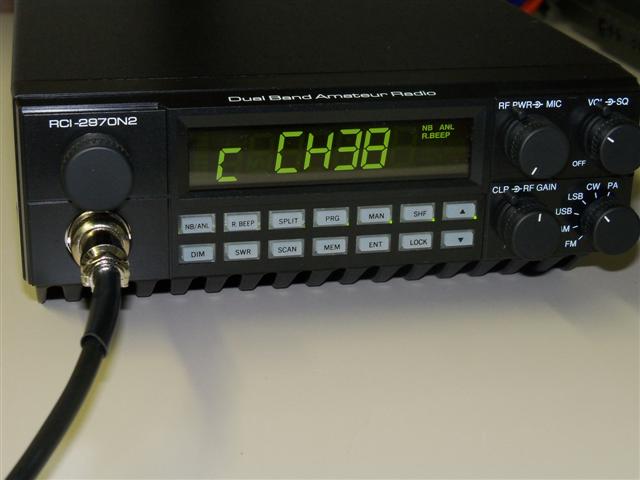
Of course the radio still has the ability to operate in channel mode (once converted for expanded frequencies) and will allow operation on the 40 CB radio channels with the channels being displayed. To enter this mode just press the MAN button once.
YES – FINALLY THE SUMMARY
The N2 is an impressive high powered radio and it definitely does the wattage boasted on the box. RCI has taken a chassis that has been a standard for SSB performance in market for many years now and upped its abilities with the addition of the large amplifier section.
While the radio + amplifier section is the same basic idea as the previous 2970DX version, RCI did make a minor change to the receive circuit and the 8 mosfets produce more power than the older model. The new model does run hotter than the old 2970DX and it is more sensitive to tuning adjustments so if you are the type of operator who just cranks all the adjustment points to maximum this isn’t the radio for you. Heat can always become a problem in transmitting circuits and just for argument’s sake I did crank the radio up and ran it for a while until I could cook an egg on the heat sink; I actually ran into some frequency drift at that point, which is something you don’t normally see with these radios, and when I opened the case it was apparent that if tuned to the max and run excessively the amplifier section can create enough heat inside the radio to cause issues.
While this might be of some concern to those operators who think squeezing 5 or 25 extra watts is all important, for the majority of the population you have nothing to worry about. When set up properly these radios can chug along at 200 watts without issue. If you need to try to hit 400 watts you should be looking at an external amplifier.
The 2970DX was a favorite of mine for shooting DX because it didn’t require the use of a separate amplifier which also means you don’t have extra coax, extra bulk, and extra wires clogging up your vehicle or shack table. The 2970 N2 continues this tradition and its 200 watts are plenty for local talking and allow you to easily make DX contacts. I found that with this radio I was able to run it in the low power position the majority of the time and really never even needed to turn it up in order to make contacts.
SSB operation was just as it has always been with the other versions. A joy to use, easy to understand other stations, great frequency stability and great reports back from other operators.
A big plus with the new black face version is the new stock microphone included with the radio. I found the radio to have much more punch on AM with this microphone and it still allows the ability to change channels.
Of course the big talk is going to be about the two changes on the newest version. The black display is seriously cool and does offer some minor improvement in visibility from an angle. The additional memory channels are a welcomed addition especially for those operators who like to run multiple CB, freeband, and ham frequencies.
Lastly I will mention that the N2 is expensive (anywhere from $400-$450 depending on where you buy). That’s about the same as buying a 2950DX and adding a 2 transistor amplifier, but then again that’s the beauty of the N2. It’s an all-in-one unit and so you don’t have to worry about adding the amplifier or making sure the input into the amplifier is correct – the N2 has all that sorted out on its own. No extra coax and no extra wiring required.
And if the black display on the N2 is what you want but you don’t have the cash, don’t despair – the newest 2950DX versions are going to be updated with the new features and black display.
__________________________________________________________________________________________
ADDITIONAL PICTURES OF THE ORIGINAL N2

ADDITIONAL PICTURES OF THE NEW BLACK DISPLAY N2


FEATURES ( WWW.RANGERUSA.COM)
TECHNICAL SUPPORT
Alignment Procedures
RCI-2950DX
12 & 10 Meter Mobile
( Note: For non-DX Series, see 2950 Series )
![]()
Equipment required for Alignment procedure:
• DC Power Supply ( 13.8 Vdc, 20A )
• Oscilloscope (50 MHz), with X10 probe
• 50 W dummy load
• Frequency Counter – 100 MHz
• Digital voltmeter or Multimeter
• RF Signal Generator
• Audio Generator
• Automatic Distortion Meter
• SINAD Meter
• RF Wattmetter ( 25~60 MHz, 100W )
• Automatic Modulation Meter
To view Main PCB Adjustment for location of adjustment points, please see this drawing – 2950DX Main PCB. After viewing, press “back” to return to this page.
The following steps are required to re-align the RCI-2950DX:
Caution: Alignment should only be attempted by personnel trained in RF product testing and alignment.
![]()
PLL Synthesizer / Oscillator Frequency Alignment:
1. PLL2 – VCO Voltage:
A. Set radio to 24.890 MHz, AM RX mode, connect multimeter to TP10.
Adjust L14 for 1.0 Vdc ± 0.1.
B. Set frequency to 29.699 MHz, AM RX mode, connect multimeter to TP10.
Adjust L14 for 4.5 Vdc ± 0.1.
2. PLL1 – VCO Voltage:
A. Set radio to 24.890 MHz, AM RX mode, connect multimeter to TP10.
Adjust L13 for 1.0 Vdc ± 0.1.
B. Set frequency to 32.000 MHz, AM RX mode, connect multimeter to TP10.
Adjust L13 for 6.5 Vdc ± 0.1.
2. AM Frequency:
Set radio to AM RX mode, clarifier to 12 o’clock,. Connect frequency counter to TP16.
Adjust VC2 to 10.1 MHz ± 10Hz.
3. VCO Output:
Set radio to 28.000 MHz, AM RX mode, connect oscilloscope to TP3.
Adjust L17 to 38.6950 MHz (maximum output).
4. AM OSC:
Set radio to AM TX mode, modulation off, connect frequency counter to TP5.
Adjust L18 to obtain 10.6950 MHz ± 10Hz.
5. USB OSC:
Set radio to USB TX mode, modulation off, short TP6 to ground, connect frequency counter the TP5.
Adjust L20 to 10.6975 MHz ± 10Hz.
6. LSB OSC:
Set radio to LSB TX mode, modulation off, connect frequency counter to TP5.
Adjust L19 to 10.6925 MHz ± 10Hz.
This completes this stage of the alignment procedure.
![]()
Receiver Alignment:
1. Receiver Setup: Put the mode selector on AM, the RF gain fully clockwise (maximum gain), squelch to minimum (unsquelched), volume at 2 o’clock, set frequency to 28.295 MHz, and NB/ANL to OFF. Connect signal generator set at RF carrier frequency of 28.295 MHz, AM modulated with a 1 KHz audio tone at 30% modulation level.
2. AM Sensitivity:
Connect a SINAD meter to the external speaker jack.
Adjust L3, L4, L6, L7, L8, L10, L11 and L12 for best SINAD.
Increase the RF generator to 1mV RF carrier level.
Adjust L3, and L4 for minimum distortion.
Verify that the receiver AM sensitivity is better than 0.5µV for 10 db SINAD.
3. FM Distortion:
Change the RF generator to the FM mode, 1mV RF carrier level, FM modulated with a 1 KHz audio tone ± 3 KHz modulation level.
Adjust L5 for minimum distortion.
4. USB Sensitivity:
Turn off the audio modulation of the RF generator, and change it’s frequency to 28.296 at an RF carrier level of .5 µV. Set radio to USB RX mode.
Adjust L11 and L12 for audio output greater than 2V.
5. LSB Sensitivity:
Keep the audio modulation of the RF generator off, change frequency to 28.294 at an RF carrier level of 1mV, set radio to LSB mode.
Adjust L11, and L12 for audio output greater then 2V.
6. NB Adjust:
Set radio to 28.305 MHz AM RX mode, NB-ANL/OFF switch to ON, adjust RF generator to 28.305 MHz with an RF carrier level of 1mV, AM modulated with a 1 KHz audio signal at 30% modulation. Connect a digital voltmeter to TP1 (R11).
Adjust L1 and L2 for DC Voltage to max ( 1.3V ).
7. AM Scale Meter:
Turn NB-ANL switch to OFF, SWR/S/RF switch to S/RF position, set radio frequency to 28.305 AM RX mode, RF signal generator setting 28.305 MHz with a carrier level of 100 µV, AM modulated with a 1KHz audio signal at 30%.
Adjust VR1 so that bar graph reads 6 bars.
8. USB Scale Meter:
SWR/S/RF switch to S/RF position, set radio frequency to 28.495 MHz USB RX mode, RF signal generator setting 28.496 MHz with a carrier level of 100 µV, no audio modulation.
Adjust VR2 so that bar graph reads 6 bars.
9. AM Squelch:
Set radio frequency to 28.495 MHz AM RX mode, SQ control fully clockwise, RF signal generator setting to 28.495 MHz , RF carrier level at 1 mV, AM modulated with a 1 KHz audio signal at 30%.
Adjust VR4 very slowly until squelch noise just goes off.
10. SSB Squelch:
Set radio to 28.495 MHz USB RX mode, SQ control fully clockwise, RF signal generator setting to 28.496 MHz , RF carrier level at 1 mV, with audio modulation.
Adjust VR3 very slowly until squelch just goes off.
This completes the Receiver stage of the alignment procedure.
![]()
Transmitter Alignment:
1. Driver BIAS:
Remove the “Shorting PCB” from TP7, TP8, and TP9. Set radio to USB mode, connect current meter to TP9 (+) and TP8 (-).
Adjust VR11 to obtain 50 mA.
2. DRIVER BIAS:
Set radio to USB mode, connect current meter to TP9 (-) and TP7 (+).
Adjust VR13 to obtain 10 mA.
3. SSB & AM RF Power:
Reconnect the “Shorting PCB” from TP7, TP8, and TP9. Connect a watt meter and a 50 Ohm load to the antenna connector, set radio to 28.495 MHz, USB mode, mic gain to maximum. Inject 30 milivolts of 1 KHz audio into the audio input pin of the mic jack (pin 2). Set SSB power control (VR12) to full counter clockwise position (maximum power position).
Adjust L18, L33, L40, L42, L43, and L44 to obtain maximum power output.
Adjust SSB power control (VR12) to 21 watts peak RF power output.
Change mode to AM
Adjust VR15 to obtain 10 watts RF power output.
4. Power Meter:
Set radio to 28.495 MHz, AM mode, mic gain control to maximum, meter switch to S/RF and key the transmitter.
Adjust VR10 until the RF meter reads 10 watts
5. TX AM Modulation:
Set radio to 28.495 MHz, AM mode, mic gain control to maximum, key the transmitter. Inject 30 milivolts of 1 KHz audio into the audio input pin of the mic jack (pin 2).
Adjust VR17 to 100% modulation.
6. CW Side-Tone Signal:
Connect a voltmeter directly across the speaker, key the transmitter using the CW jack in the rear of the radio.
Adjust VR9 to obtain 200mV across the speaker.
This completes the Transmitter stage of the alignment procedure.
