Resurrecting a Dead D-104
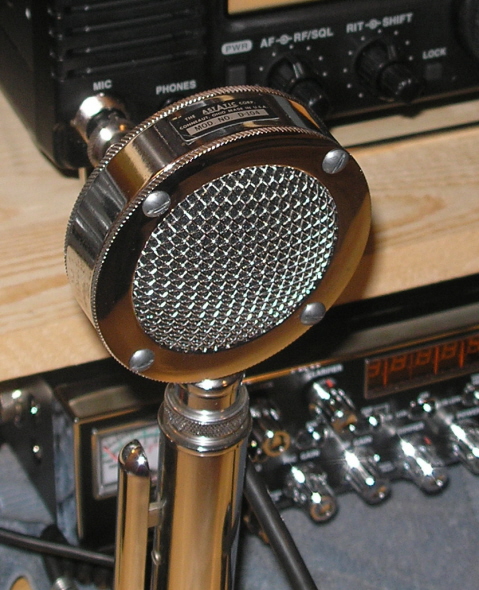
I got a good deal on a nice-looking D-104 T-UG8 but could NOT get rid of the RF feedback, no matter what I did. I put a FET in front of the existing preamp, replaced the preamp with an entirely different circuit, and hung bypass caps on everything– nothing helped.
I finally decided the crystal element was the culprit – if for no other reason than it was the only thing left besides the switch!
So I replaced it with one of the small, cheap, easy-to-find electret condenser elements. Ive used similar mic elements for years in contact mics for musical instruments in performance settings, and knew that theyre capable of excellent sound and high output. Here’s how it went:
Dont be afraid to take a D-104 apart, the mic element is just a round disk held in place on the round frame by two rubber pieces that wedge in between the element and the frame. It’s about 3/8″ thick, so a piece of 3/8″ plywood does the trick:
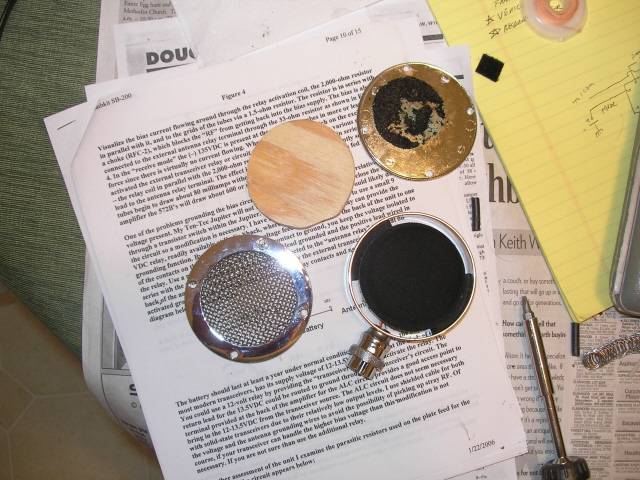
About 5 minutes with a sabre saw and a belt sander, and I had a piece that would fit:
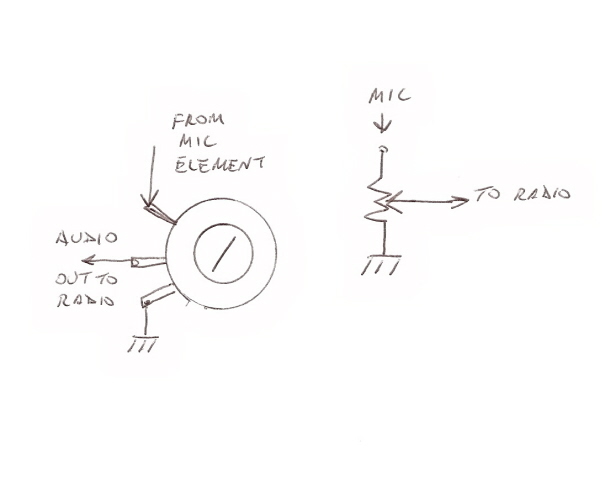
The D-104 switching takes a little head-scratching with its break-before-make contacts, but in the TUG-8 at least it’s just a DPDT.
The way to wire the switch depends on your radio– it was more of a pain in the butt for me because my radio required that the mic ground and the PTT ground be kept separate.
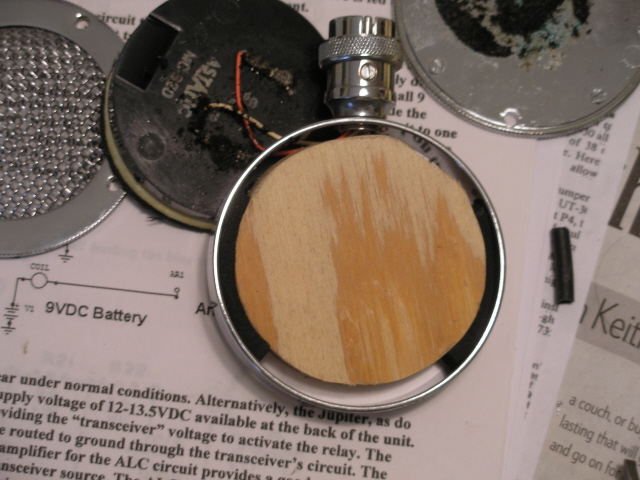
One side of the wood was spray-painted flat black (you won’t be able to see the back side), and I used the paint-drying time to figure out the switching . Then I hunted up a scrap piece of circuit board and soldered a $2.99 Radio Shack condenser mic element to the board and soldered the wires that had been attached to the crystal D-104 element to the condenser element. I probably should have drilled a hole all the way through the plywood and brought the wires in from the back, but I didn’t think about that until I’d already done it this way:

I scooped out a little of the wood behind the circuit board with my Dremel so the board would lay flat against the wood, and then hot-glued the circuit board to the wood– and then took a foam earpiece off an earbud and hot-glued it around the element to act as a pop filter. The final step was to color the circuit board black with one of those big Sharpies so it wouldn’t show through the D-104 screen . These small electret condenser elements are very susceptible to breath pops, and depending on how close you prefer to have the mic to your mouth, a thin earbud foam may not provide enough of a windscreen. If thats the case, find a windscreen for a normal PA mic and cut off the front end to fit within the grille of the D-104. Thats what I eventually did to mine.
So- how does this work? Very well! My radio (an Icom– no, it’s not on 27 MHz) needs a fairly hot mic level so I ended up building a simple preamp for it, but most radios probably will not need it. The preamp was built on a small piece of circuit board, and mounted on top of the terminal strip in the mics base, using the two screws already there. Try it without the preamp first. The electret elements have a built-in preamp, and are capable of surprisingly hot output levels. The back of the bubble pack card shows the resistor and capacitor youll need to make it work. In case you need a preamp, heres what I used:
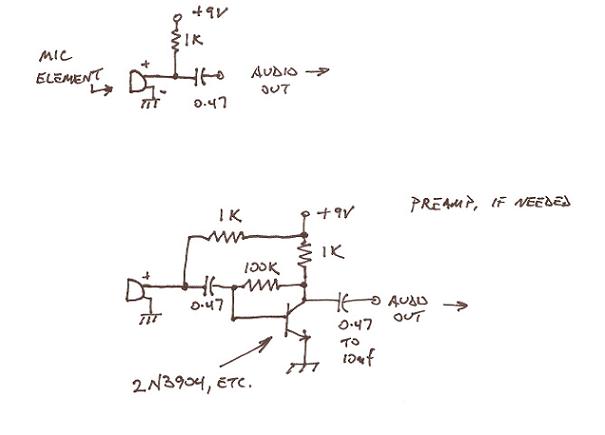
The low impedance element matches up great, and would to any low impedance radio. It doesn’t -sound- exactly like a D-104, but you can change the high/low freq response by changing the value of the capacitor to a lower value– it will work with just about anything up to 20 uf, but that sounded bassy and mushy on my radio. I settled on a 0.47 uf, which gave it a lot more “cut” without being too tinny. You can use that value or experiment with several to get the tone that suits your voice best.
If you want to get fancy you may be able to power it directly from your radio, but I used the 9V battery it had been using anyway– that allowed me to still use the 4 conductor cable. I’m going to look around for a non-working D-104 I can get cheap and do the same for my Galaxy. The existing volume control was also used since its already there and can be accessed through the bottom cover. If the output of the mic is too hot, wire the mics output to the top terminal, ground to the bottom terminal, and the audio lead of the mic cable to the middle terminal. Youll definitely want to use the pot if you use a preamp circuit:
The same thing can be done for just about any mic, such as the Turner +2, Shure 444, and most hand mics. For these mics a piece of circuit board cut to fit inside the chassis may do the trick without having to use a piece of wood, but its not critical– whatever works, just make sure it doesnt rattle around the contacts arent able to touch the chassis of the mic. Switching the battery to the element and the PTT will be slightly different for each mic, but should not be too hard to figure out.
So if you have a vintage mic youd like to put back into service, or if that Ebay Special doesnt quite work, give this approach a try. Its not expensive, and its fun to use a microphone that you rebuilt yourself- and they sound great!
Good luck and 73’s,
Hambone