SWR – what is it, and why is it so important?
SWR stands for standing wave ratio and if you are serious about the CB radio hobby than it’s probably one of the biggest keys in measuring the efficiency of your CB radio system.
A “bad” SWR can destroy a radio or amplifier in a worst case scenario, but in most cases it will just mean that your system isn’t working great and will sound like crap.
The standing wave ratio is exactly what its name depicts. It’s a ratio based on how much power can be delivered to your antenna VS the amount of power that is reflected by your antenna back down the coax to your radio.
A perfectly performing antenna would turn all the of wattage reaching it into signal and you would have no reflected energy going back down your coax. But many things such as a poorly tuned antenna, or any antenna of the wrong length, a badly grounded antenna, faulty coax, or any number of other things could cause a bad SWR reading.
To measure SWR you need an SWR meter which are readily available at about any CB shop, Radio Shack, or online.
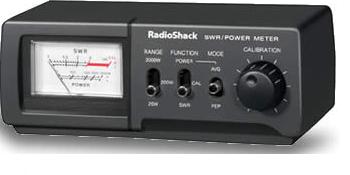
For instructions on how to measure your SWR – see the steps at the end of this article.
A SWR of 2.0 or below is good enough in most cases for you to operate your radio safely. Anything above that and the reflected power coming back to your radio can cause damage over time.
If you are running an amplifier with your setup an SWR of 1.3 or lower is recommended.
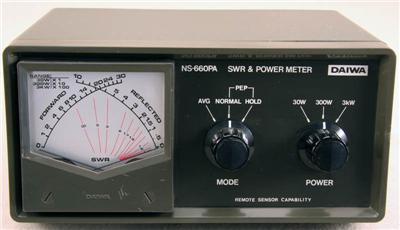
Example of a “cross-needle” meter
HOW TO ADJUST THE SWR ON YOUR RADIO
Equipment needed: SWR meter, short jumper coax 3 foot.
Procedure: The SWR meter needs to be placed in line between the antenna and the CB. Connect the antenna (normally connected to the back of the CB ) to the connector marked “Antenna” or “Ant” on your SWR Meter. Connect one end of the short jumper coax to the “transmit” or “Xmit” on the SWR meter. Connect the other end of your jumper coax to the CB.
Assuming you have a standard SWR meter the switches should read as follows: REF or SWR, FWD, and there should be a slide switch marked “set” or “Adjust”. If different consult your meter’s owners manual.
With the radio on the lowest channel (1 on CB) and the SWR meters switch in the Forward (FWD) position, depress the transmit switch (key up) located on the microphone. While holding the unit in this transmit mode, adjust the meter needle to the set position using the Set or Adjust knob on the meter. As soon as the needle is in alignment with the corresponding mark on the meter face, flip the switch to the Reference (REF) position. The meter is now showing your SWR on channel one. Note the value and quickly release the microphone switch. Record this reading.
Repeat the previous step on channels 19 and 40.
How to read your results: If SWR on channels 1, 19 & 40 is below 2.0, your radio can be operated safely.
If SWR on all channels is above 2.0 but not in the “red zone” (normally over 3.0), you may be experiencing coaxial cable reaction (bad quality, wrong length, etc.), insufficient ground plane, or have an ungrounded antenna mount.
If SWR is in the “red zone” on all channels, you probably have an electrical short in your coax connectors, or your mounting stud was installed incorrectly and is shorted. Do not operate your radio until the problem is found, serious damage can occur to your radio.
If SWR on the lowest channel is higher than it is on the highest channel, your antenna system appears to be electrically short. Your antenna length may need to be increased.
If the SWR on channel 40 is greater than that on channel 1, your antenna is considered to be “LONG” and reduction of physical height and/or conductor length will correct this situation.