Texas Ranger TR-696FD1 SSB CB Radio Review
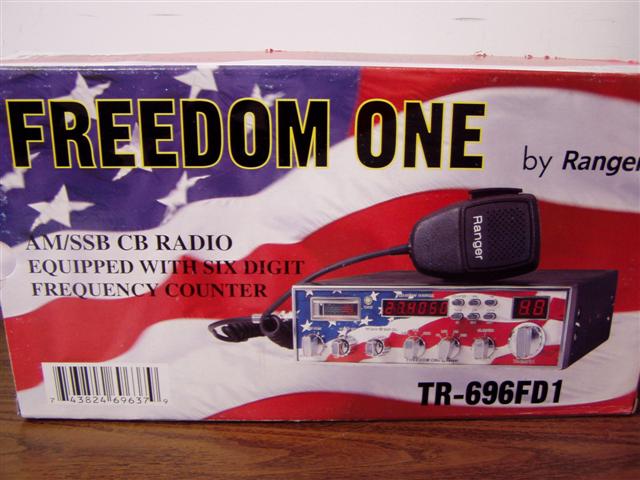
I had seen this radio advertised a couple of times but had never owned one. I’d heard good things about it but since I’d owned a 969WX previously I figured this radio would be too similar to be worth trying out. Recently though I found this model on sale and knew I’d have to give it a try.
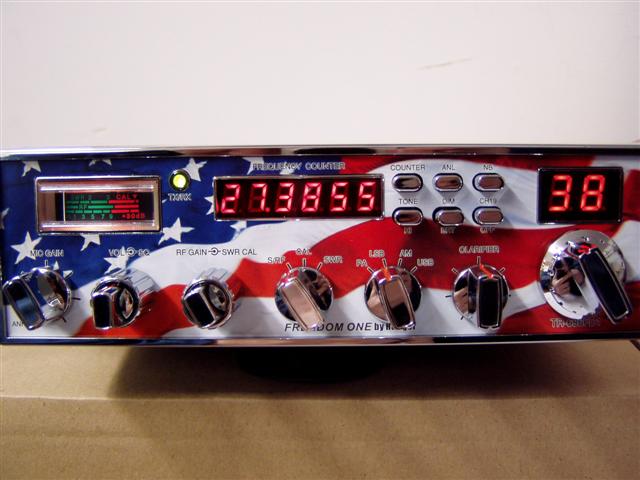
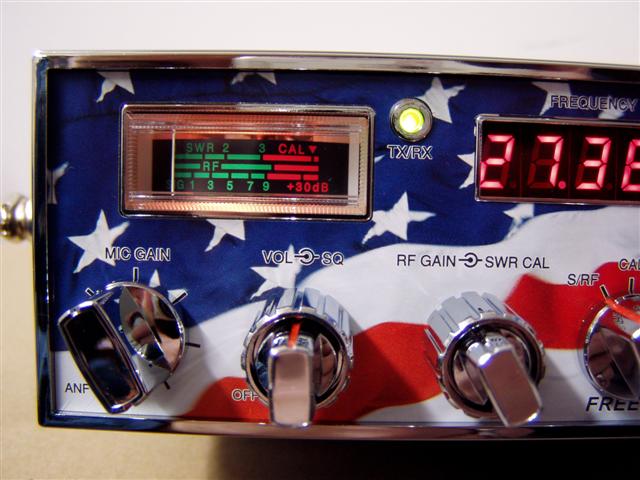
The Texas Ranger TR-696FD1 is a 40 channel AM and Sideband/SSB CB radio (not a 10 meter radio). The most prominent features are it’s six-digit frequency counter and American flag faceplate. While I’m very patriotic, I never have really felt the need to put the flag on my radios, but with the red LED’s on this radio I think it actually looks pretty good.
The radio has all of the standard features –
Mic Gain control
Volume/Squelch control
RF gain/ SWR CAL control
S/RF / CAL / SWR selector
AM / LSB/ USB/ PA selector
Clarifier control
Frequency Counter on/off button
ANL button
NB button
Tone Low/High button
Dim/Bright button
CH19 button
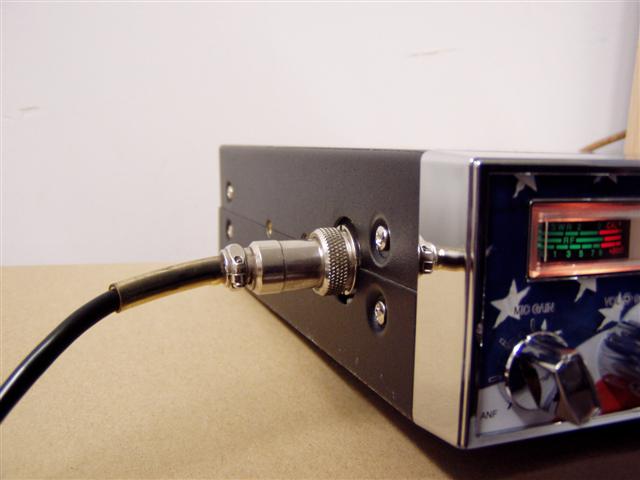
It features a 4 pin side microphone connector like the old 148’s and Grants and the radio is roughly the same size as well.
At first glance the radio looks pretty standard – S/RF meter is standard, TX/RX light, but the addition of the six digit frequency counter really makes this radio stand out. Very few “CB” radios offer the 6 digit frequency counter which is really nice to have for people who use SSB on a regular basis. While these “in radio” counters aren’t the most accurate it’s still nice to have the sixth digit.
Next to the frequency counter you’ll find a set of six buttons in a very similar setup to the (Ranger) Superstar SS-158EDX radio. The counter button gives you the option to turn the frequency counter on or off. I like this feature, in many cases when using a radio, especially on AM, there isn’t any need to have the counter on. At night sometimes a counter can be distracting and can cause a glare. So I like the choice of being able to turn it off.
The ANL/NB buttons are fairly standard and I found them to work pretty much like most radios with the ANL cutting out some of the noise and the NB not really doing a whole lot.
The Tone control button was very noticeable in its function. When pressed it cut out the high tones very effectively and I have found that especially on days with a lot of high end hiss in the receive this feature is nice.
The Dim/bright button will dim the display and it dims it a lot. I think in most cases I’d just leave it on bright. The Ch 19 button is self explanatory.
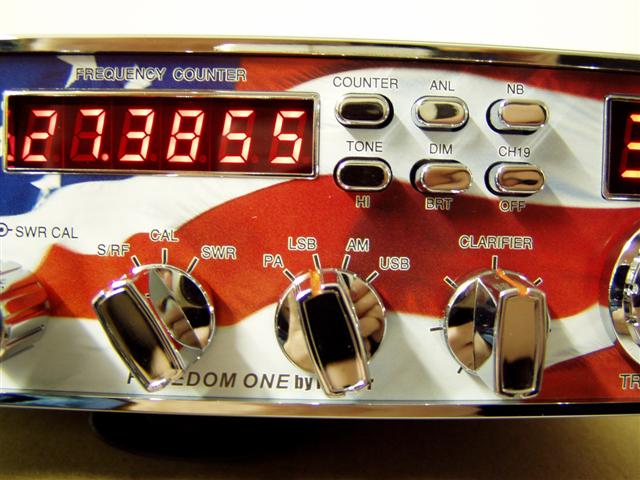
The radio has a PA function which I like to see on radios. Some new radios leave this feature off, but I like it on a radio. I did try hooking up an external talkback speaker to this radio and it did not work.
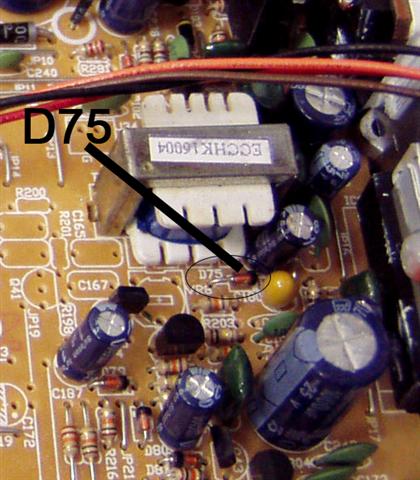
To add talkback to this radio (and TR-396, TR-696F, TR-936 & the TR-966 as well) remove D75.
D75 is located in the right rear region of the radio – see picture below.
Looking at the back, the radio shows in two places that it was made in Malaysia, another thing I like. It’s nice to see something not made in China these days.

A FCC type approved sticker adores the back of the radio meaning this is a legal CB radio 🙂

Opening the Box
I got the radio out and one of the first things I noticed (this can be seen somewhat in the picture above) is that the radio had a thin plastic covering on both the top and bottom covers of the radio. This covering is like a protective tape that has been added. I’m sure it can be removed but it seems like a very durable covering that will protect the case from scratches and such. I’ve never seen this on any new radio I’ve purchased previously.
If you looked at the pictures of the frequency counter at the beginning of the article you’ll notice it read 27.3855. Yes, the radio was off frequency right out of the box.
This is one of the reasons most CB shops offer a tune/alignment option to their customers on new radios. Although every radio is QC tested by the factory, after sitting in a box for 6 months and making a ocean journey from Asia to the United States most SSB radios need some adjustment.
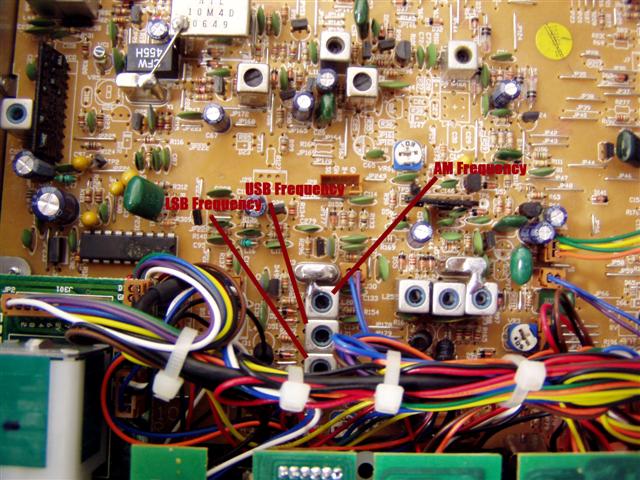
The adjustment to get the radio on frequency was very simple and even most inept people should be able to handle it themselves if necessary. It basically just means you have to adjust L20 (AM) L21 (USB) L22(LSB).
Once the radio was on frequency I immediately received some AM and SSB signals and I was impressed. The receiver in this radio is very good. I was comparing it to my Grant LT and HR2600 and while not quite at their level it was very very close to being as good as either radio. Not much difference. Signals were easily understood and the tone quality was very easy on the ears. I spoke to a station who I talk to regularly and he sounded very normal and the signal strength was the same as my other radios.
Next I started testing Transmit. The following numbers are for the stock radio – no tuning.
AM deadkey 3 watts – with modulation swing to 10 watts peak, average 5-7 watts.
SSB swing to 8 watts peak, average 5 watts
These numbers weren’t very impressive, but as we all know most radios aren’t tuned up very high from the factory so that they will be FCC compliant.
I opened the radio up and made adjustments to the modulation VR16 (adjusted to maximum) and the SSB ALC VR 13 (turned up to about halfway).
Immediately the difference was very clear.
AM deadkey 3 watts – with modulation swing to 18 watts peak, average 10-12 watts
SSB swing to 22 watts peak, average 10-15 watts.
I then got on the radio and talked to a local station on SSB and he said the radio was clear, had good modulation (no distortion) and he was receiving me at about 4 S units (35 miles away – horizontal to horizontal antennas).
After about 5 mins of talking I noticed the rear area of the radio near the final transistor was getting pretty warm and decided I probably turned up the ALC a little too much. I backed it down a bit for peak numbers of 15-18 watts and after another 5 minutes checked the back of the radio and it had cooled down and wasn’t overheating. So even though this radio did some impressive numbers after tuning, I’d run it at less than maximum for best results and to prevent any excessive heat from damaging the radio.
I tested out a DM-452 microphone and it gave about the same numbers and sound to the other station as the stock SRA-158 (one of my favorite microphones) that comes with the radio.
The frequency counter on this radio was pretty accurate and unlike some of the counter/radio drift issues I ran into with the SS-158EDX, this radio was very stable on SSB and I didn’t have to touch the clarifier at all.
The radio uses a EPT069610Z chassis which is the same board used by the TR-966, Galaxy 949 and 959, Galaxy 2547. This is a good thing as there is a pretty simple mod to add extra channels using a 2 switch setup. In addition this chassis can also have a second final modification done to turn it into a dual final radio (not something that’s really worth the time or money in my opinion).
I haven’t yet tried the radio with my Turner +3 to see what kind of audio I can get out of it. I’d say from my early testing that the audio with a good power microphone added should be fairly loud and clear, but I don’t think it’s going to have the loud audio of many of the export radios (Galaxy, General, Connex) and I wouldn’t really expect it to. I had no problems talking to my local stations and the radio had plenty of audio necessary to reach them and sound good on the air.
Matching this radio up with a good amplifier would probably yield a very clean sounding station on the air. Even with the modulation inside the radio turned to max and the mic gain at max I didn’t run into any distortion issues with either the stock SRA-158 microphone or the DM-452.
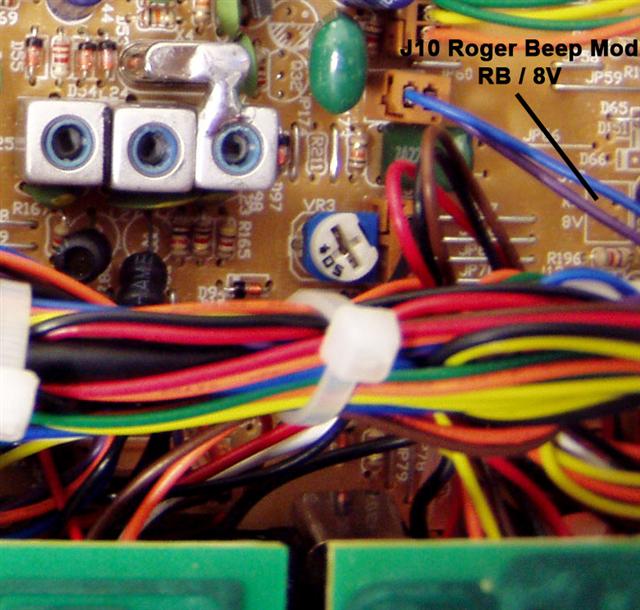
One last modification to mention is the roger beep mod. This radio has a roger beep circuit intact on the board from the factory. To enable it all you need to do is add a switch. The location is J10 and there will be two open holes (RB & 8V). Run a wire from each to a on/off switch and you’ll have a switchable roger beep. See picture at end of article.
Overall I have to give this radio a very positive review. I really like the 6 digit counter, the radio performed very well after tune up and gave numbers reminiscent of some of my high performing 146GTL/PC-122’s in terms of SSB output. I like the fact that it took very minimal tuning to get the peak numbers up and to have a good sounding and performing radio.
Receive is excellent and the radio was very stable on frequency. I haven’t yet tried it out in the mobile so I don’t know how much electrical noise it may pick up.
The radio is built on a tried and true chassis and I expect it to get some good use out of it.
See picture below for AM and SSB power adjustments and Modulation adjustment

See below picture for locations to adjust frequency
Roger beep location – near front of radio to the right side – J10
